GAI MAITO HQS
BY TSUME
ASSEMBLY INSTRUCTIONS
ASSEMBLY INSTRUCTIONS

PLEASE DO NOT ASSEMBLE YOUR COLLECTIBLE STATUE IMMEDIATELY AFTER RECEIVING IT


PREFERABLY WEAR LATEX GLOVES TO HANDLE YOUR STATUE.
You must be at least two people to assemble this statue.
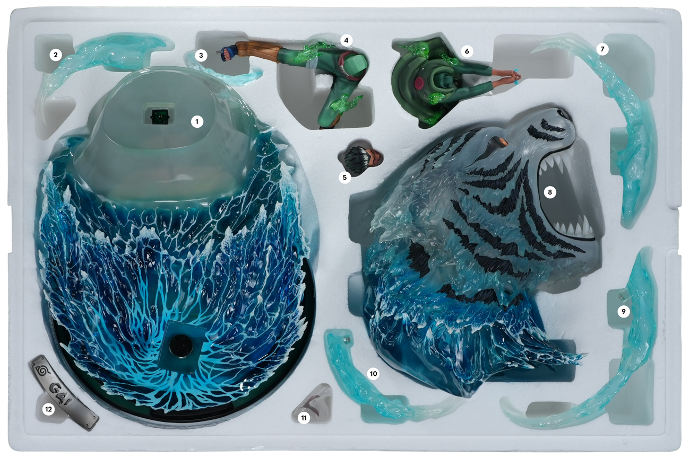
You MUST be careful with the different parts when removing them from the polyfoam. There are many risks of breakage when handling them.
FLOOR 1
FLOOR 2

Please wait at least 48 hours after receiving your statue to proceed with its assembly.
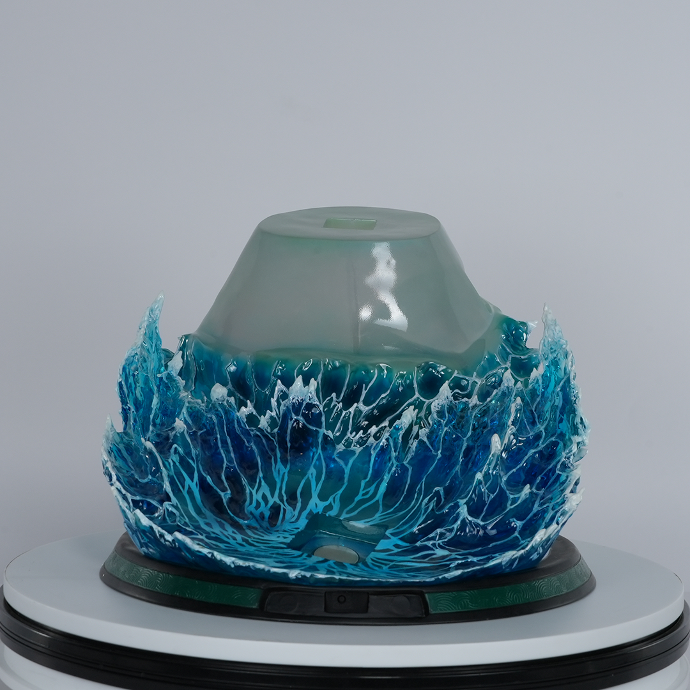
1. Place the base (1).
Important Note!
To handle the tiger, place one hand under its chin and the other hand at the back of the tiger on the non-textured part.
When fitting it onto the base, be cautious of the wave tips indicated in this video. (Presenting the tiger at the wrong angle may cause it to break at this point.)
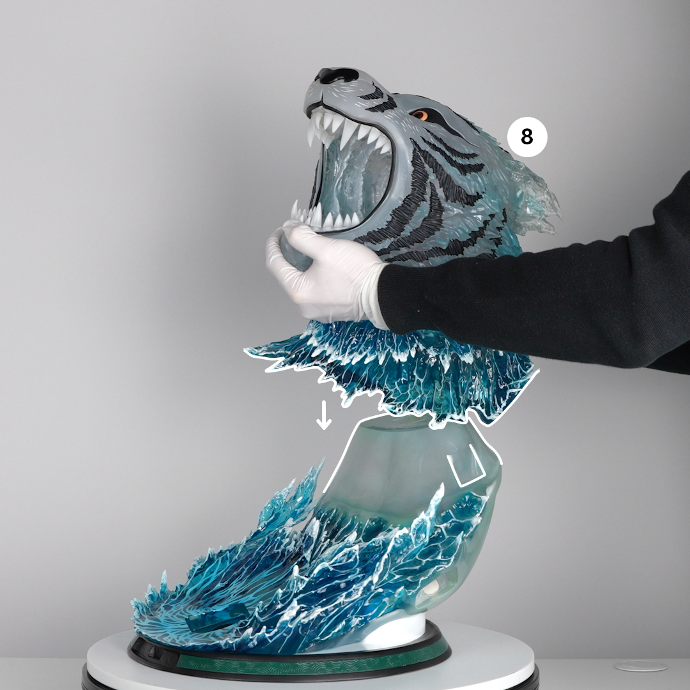
2. Insert the tiger head (8) onto the base (1).
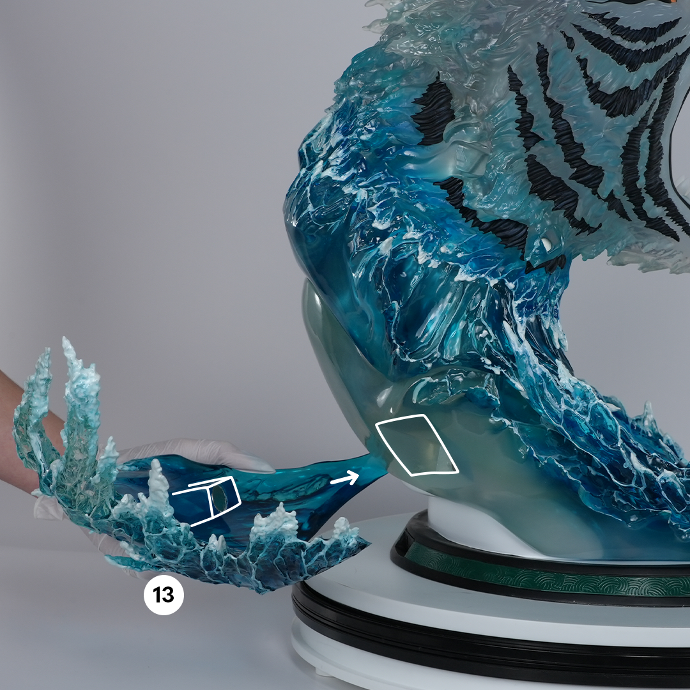
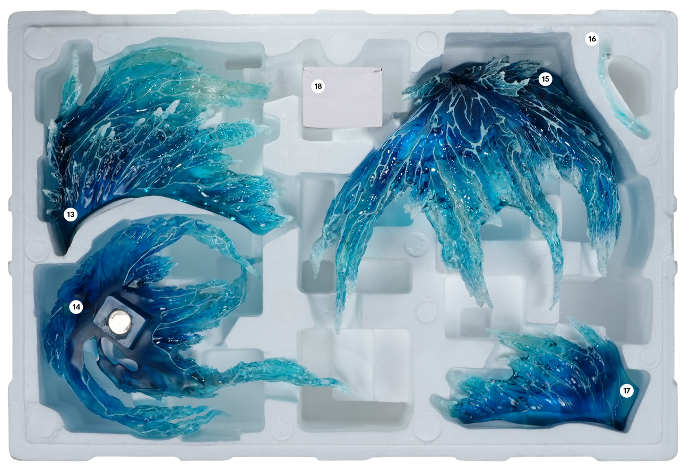
3. Insert the wave (13) at the right back of the statue on the base (1).
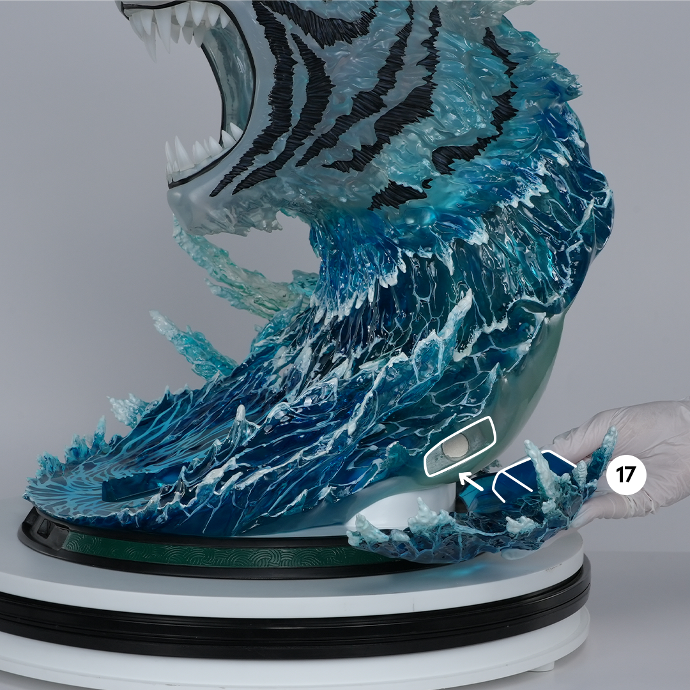
4. Insert the wave (17) at the left side of the statue on the base (1).
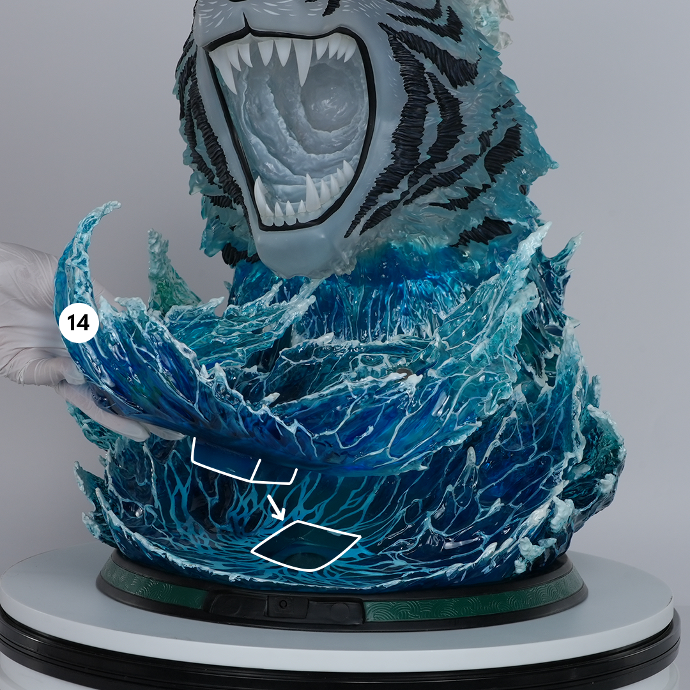
5. Insert the wave (14) onto the base (1).
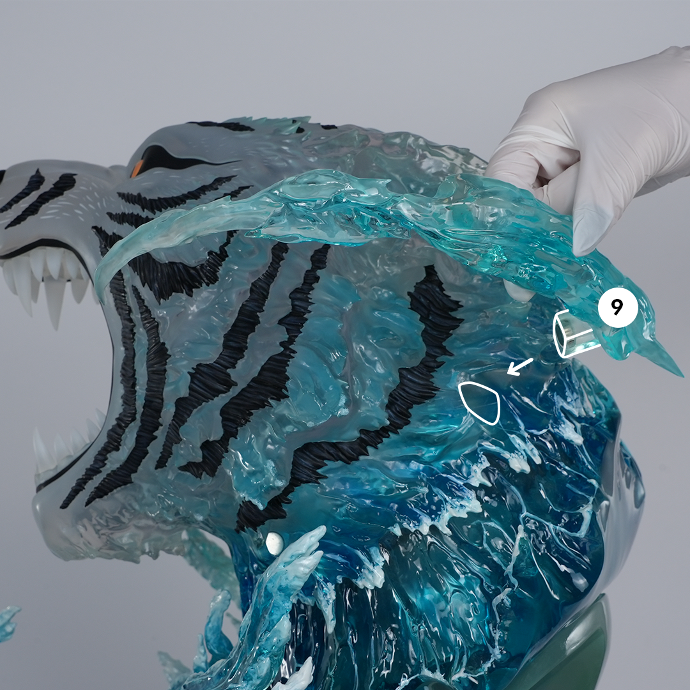
6. Insert the wave (9) on the left side of the statue.
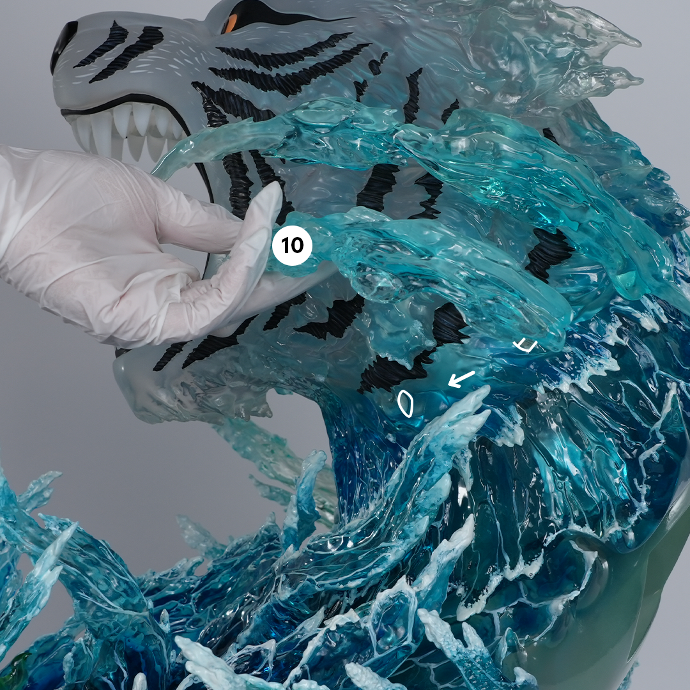
7. Insert the wave (10) on the left side of the statue.
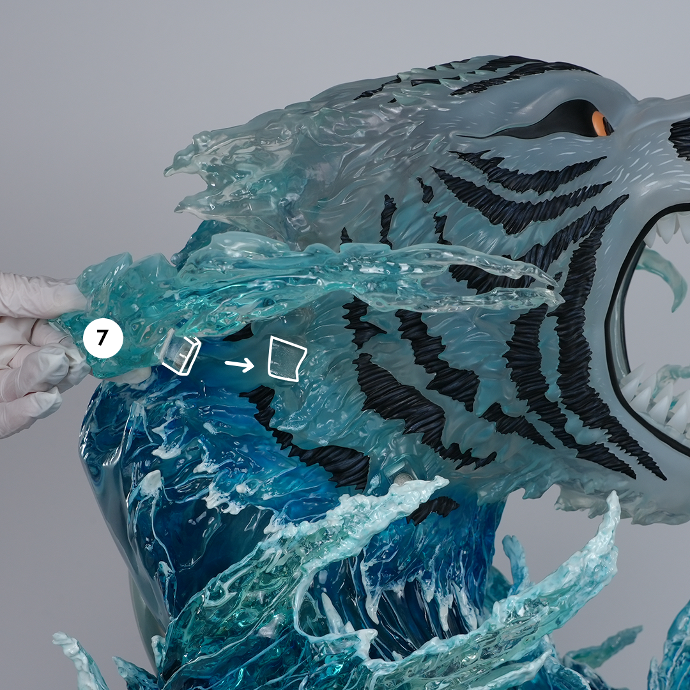
8. Insert the wave (7) on the right side of the statue.
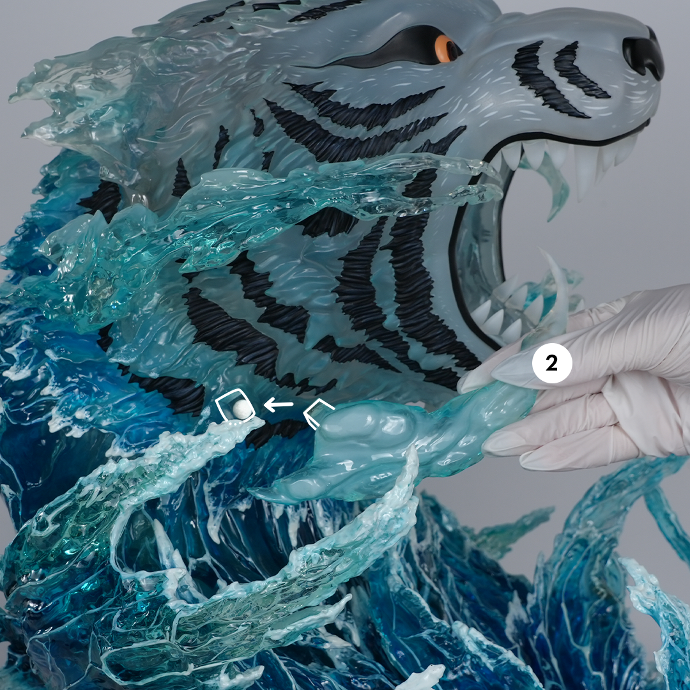
9. Insert the wave (2) on the right side of the statue.
Important Note!
Be mindful of contact with other waves during this step to avoid any risk of friction or breakage.
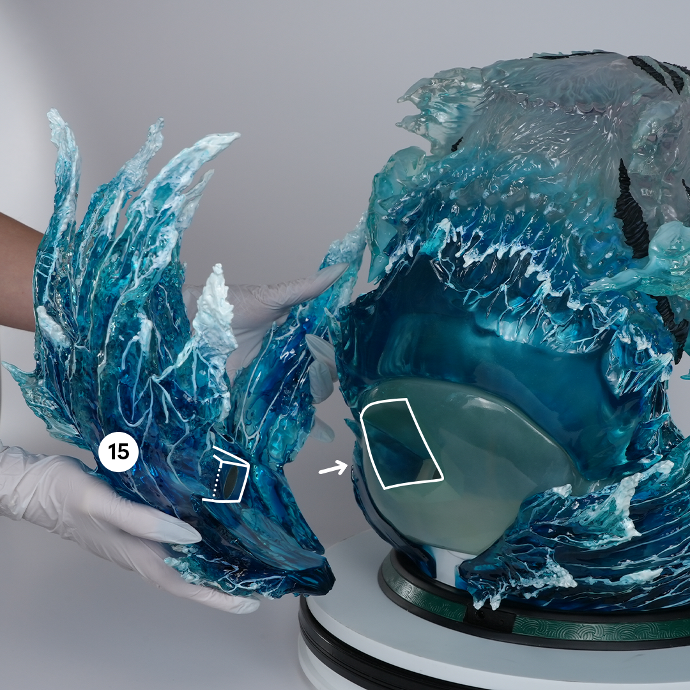
10. Insert the wave (15) on the back of the statue.
Important Note!
After waiting 48 hours after opening the polyfoam, carefully insert this water effect
If necessary, gently press on the effect to fit it properly, without forcing.
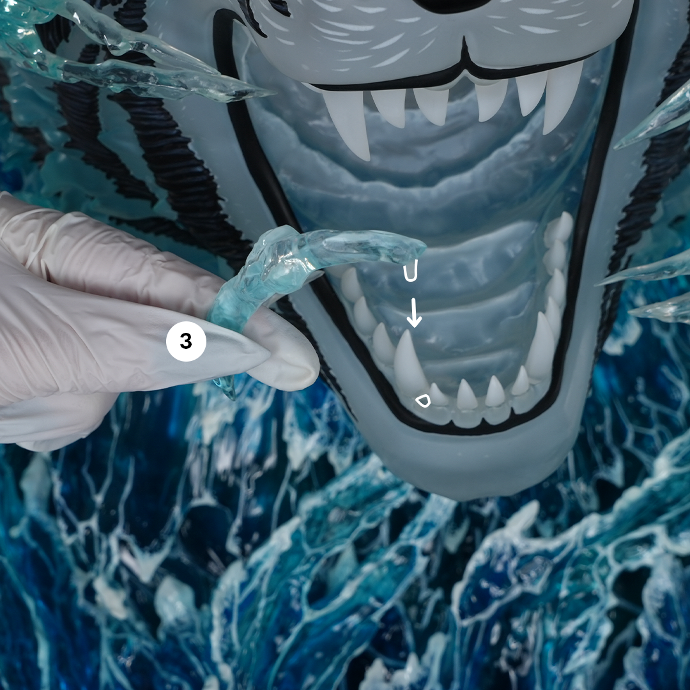
11. Insert the water effect (3) between the tiger's fangs (8).
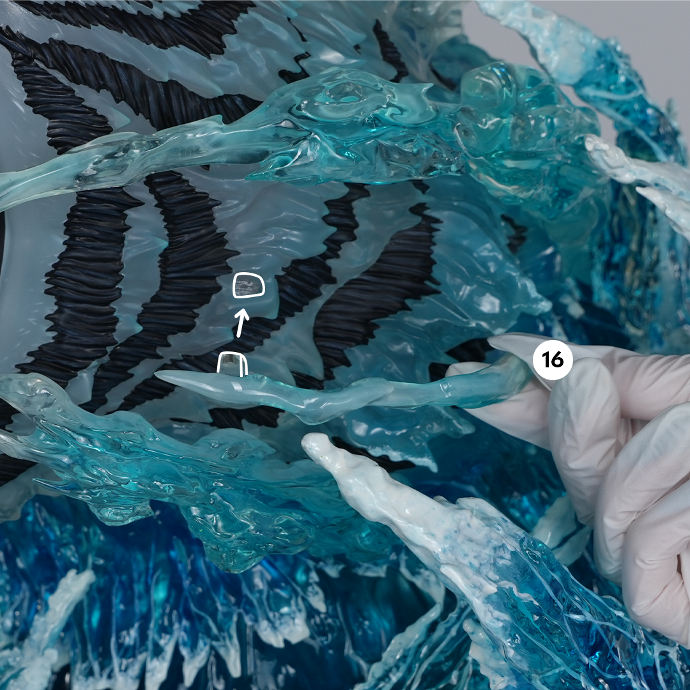
12. Insert the water effect (16) on the tiger's left cheek (8).
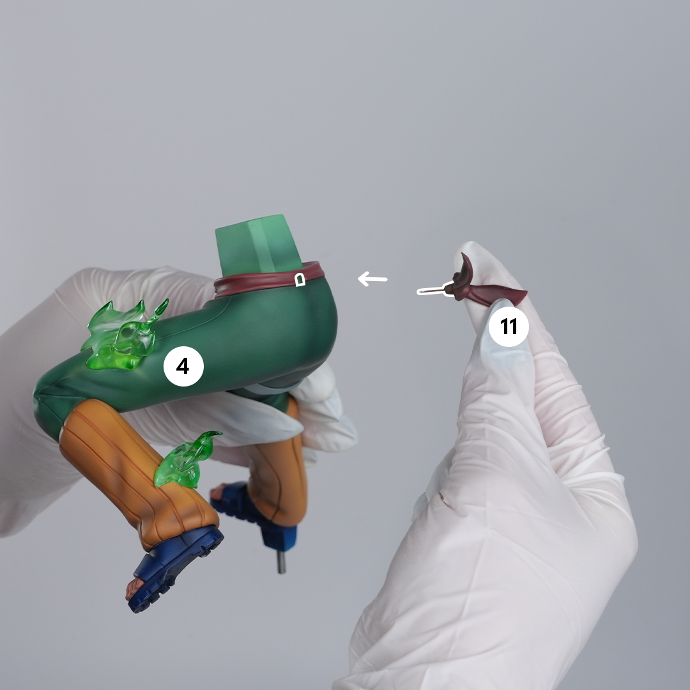
13. Insert Gai's knot (11) on the bottom of his body (4).
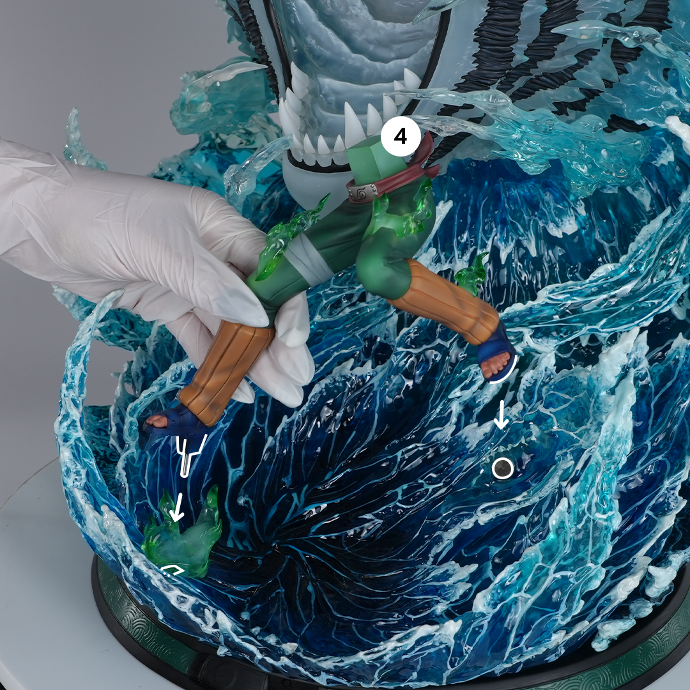
14. Insert Gai's lower body (4) onto the big wave (14).
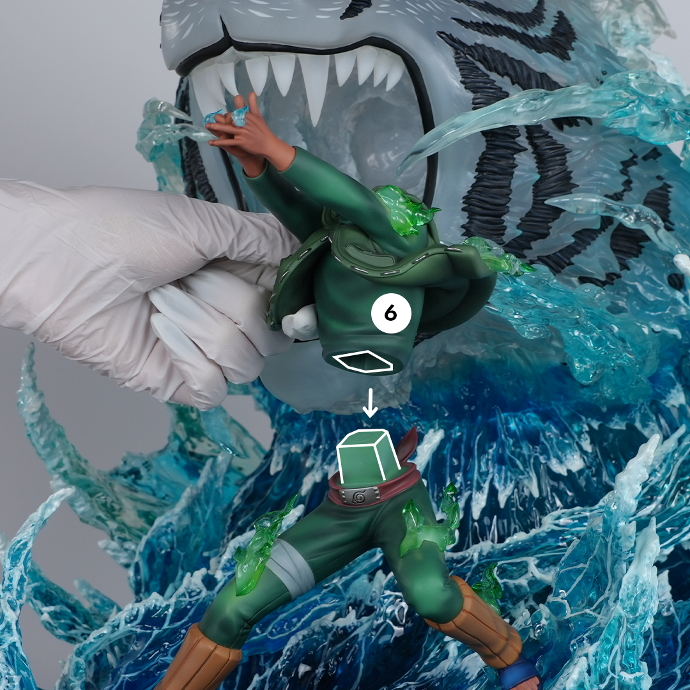
15. Insert Gai's upper body (6) onto the lower body (4).
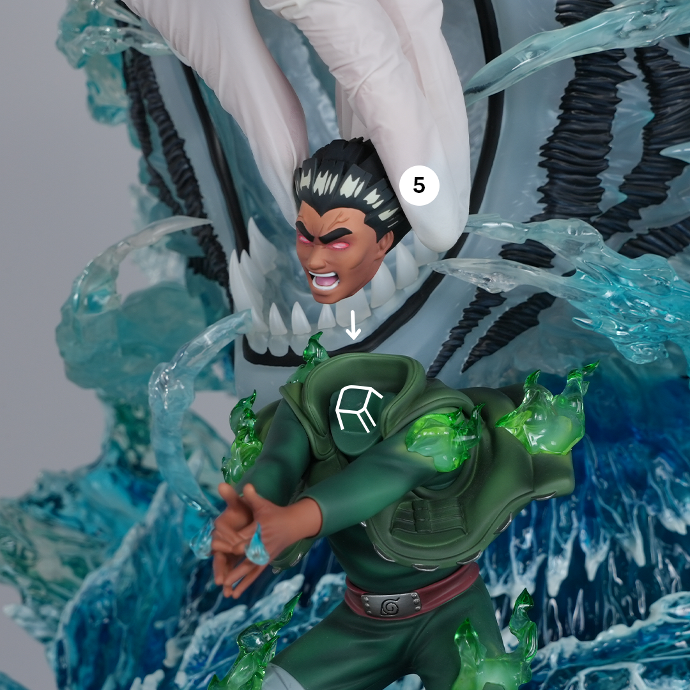
16. Insert Gai's head (5) onto his body.
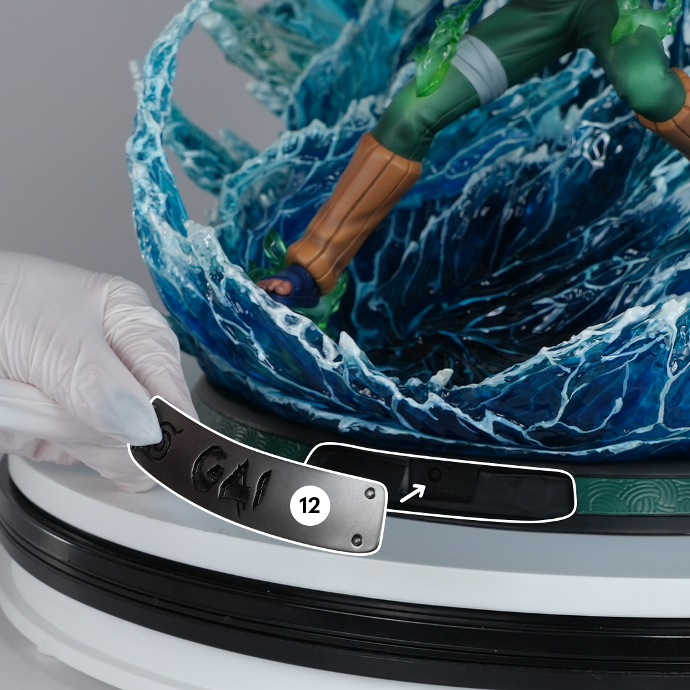
17. Insert the Gai nameplate (12) onto the base (1). There is a button to turn on the LEDs behind the plate.
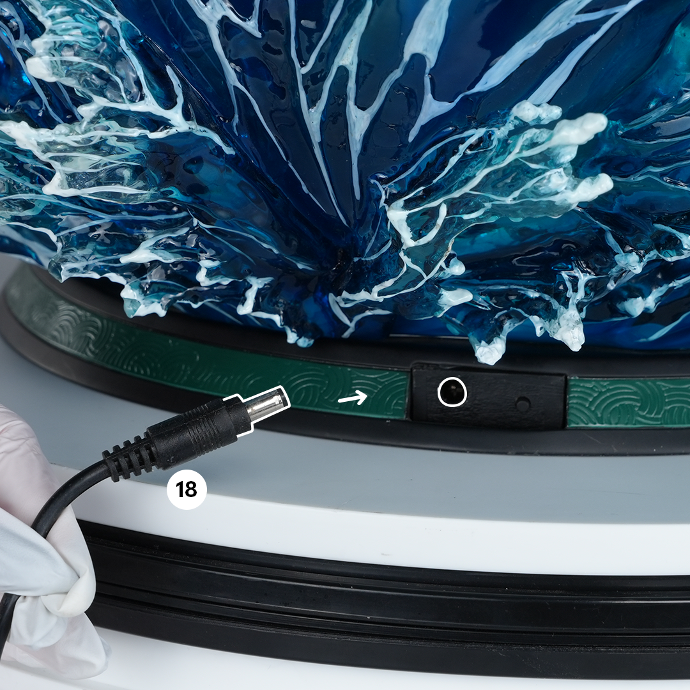
18. Insert the power cable (18) into the base (1). There is a button to turn on the light to the right of the connector.

Enjoy your statue
